

Table of Contents
- Why Do Screen Printed Shirts Crack?
- How to Wash Graphic Tees: Step-by-Step
- How to Dry Graphic Tees Without Damage
- How to Iron Graphic Tees Safely
- How to Store Graphic T-Shirts to Prevent Cracking
- How to Fix Minor Cracks Before They Spread
- Common Laundry Mistakes That Ruin Graphic Tees
- Conclusion: Keep Your Graphic Tees Looking New
- Frequently Asked Questions
Last Updated: September 7, 2026
Few things are more disappointing than watching a favorite graphic tee develop cracks after just a few washes. The good news is that cracking is almost entirely preventable, and knowing how to prevent graphic tees from cracking starts with the right care routine. Learning how to prevent graphic tees from cracking comes down to understanding a few simple rules about washing, drying, and storage. At Shine Bright Shirts, we believe proper care is just as important as print quality.
The science behind cracking is simpler than most people think. The prints on most graphic tees are a layer of ink bonded to the fabric surface. When that layer is flexed, heated, or rubbed incorrectly, it loses adhesion and breaks apart. This guide covers the full lifecycle of a tee, from the wash cycle to the closet shelf, so you can protect your investment and keep your favorite pieces wearable for years.
Why Do Screen Printed Shirts Crack?
To prevent cracking, you need to understand what the print actually is. Most graphic tees use one of three ink systems, and each fails differently. Knowing which one you own tells you exactly how careful you need to be.
Plastisol ink is the industry standard for screen printing. It is a suspension of PVC particles in a plasticizer (pubs.acs.org). When cured, it forms a thick, rubbery film that sits on top of the fabric rather than soaking in. This is why plastisol prints feel raised and have a slight texture. The film is durable but not flexible. Every time the shirt stretches, bends, or rubs against something, that rigid film is forced to flex. Over time, the plasticizer migrates or evaporates, especially when exposed to heat. As the plasticizer leaves, the film becomes brittle and loses its adhesion to the cotton fibers. The result is the familiar network of fine cracks that appear first in high-stress areas like the collar, the armpits, and across the chest where the fabric folds.
Water-based ink, often called discharge ink, is the opposite. It is absorbed into the fibers rather than sitting on top. The result is a soft, breathable print that feels like part of the shirt. Because there is no separate film layer, water-based prints are far less prone to cracking. They fade gradually rather than fracturing. However, they are more susceptible to friction damage from abrasive washing, which can abrade the dyed fibers themselves.
Direct-to-garment (DTG) printing uses a water-based ink that is sprayed onto the fabric and then cured. DTG prints are thin and soft, but they are also more delicate than plastisol. The ink bonds to the top layer of fibers, so aggressive washing or high heat can break that bond and cause the print to fade or crack in a powdery pattern.
Heat transfer vinyl (HTV) is a plastic film that is cut into a design and heat-pressed onto the shirt. HTV is the most crack-prone option. The film is not flexible, and it is glued to the fabric with a heat-activated adhesive. When the shirt is washed in hot water or dried on high heat, the adhesive weakens, and the film begins to lift and crack at the edges.
The common thread is that heat and friction are the enemies of every print type. Heat accelerates the breakdown of the chemical bonds that hold the ink to the fabric, whether those are plasticizers in plastisol or adhesives in vinyl. Friction physically abrades the print surface. Understanding this mechanism is the first step toward a care routine that actually protects your investment.
How to Wash Graphic Tees: Step-by-Step
The single most effective habit for preventing graphic tee cracking is turning the shirt inside out before washing. This simple action protects the print from direct friction against other clothes and the drum of the machine.
Follow this routine for every wash:
- Turn the graphic tee inside out so the design faces inward.
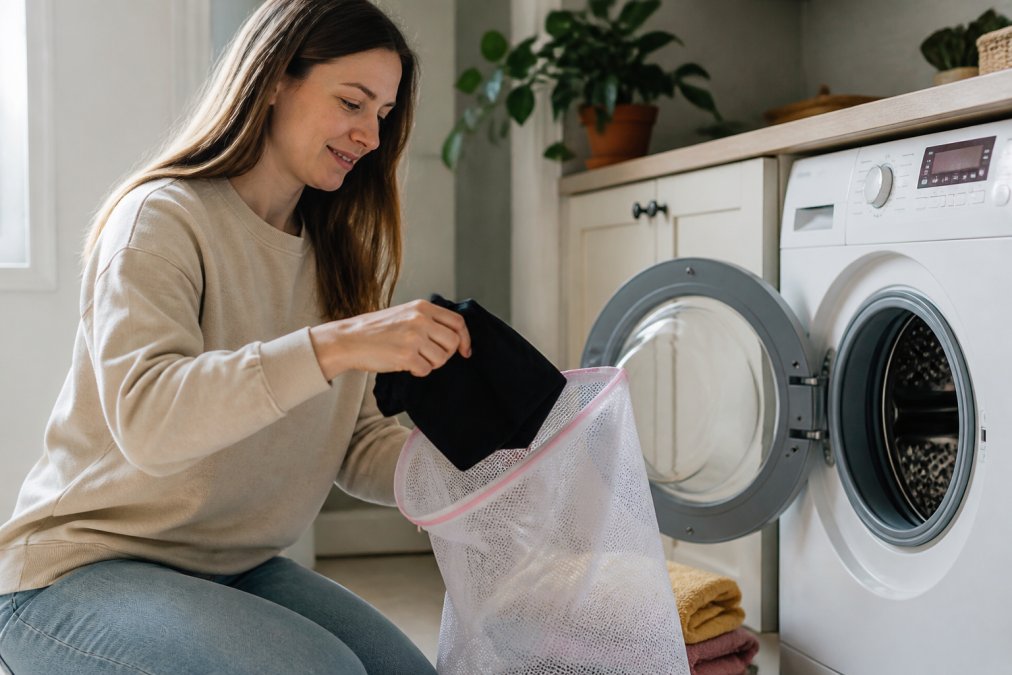
- Place the shirt in a mesh laundry bag for extra protection.
- Select a cold water wash, ideally below 85 degrees, to keep the ink from softening (cleaninginstitute.org).
- Choose a delicate or gentle cycle to reduce agitation and spin speed.
- Use a mild liquid detergent free of bleach and optical brighteners.
Cold water is non-negotiable. Hot water softens the ink and accelerates the breakdown of the bond between print and fabric. Skip fabric softeners entirely, as they leave a residue that can weaken the adhesive properties of the print over time.
How to Dry Graphic Tees Without Damage
Air drying is the gold standard for preserving graphic tees. The heat from a tumble dryer is one of the fastest ways to ruin a print, causing both cracking and peeling. Line drying or laying the shirt flat avoids this risk entirely.
If you must use a dryer, follow these precautions:
- Keep the setting on low heat or air fluff, never high.
- Remove the shirt while it is still slightly damp.
- Turn it right side out only after it is fully dry.
High heat causes the ink to expand and contract at a different rate than the cotton fabric, which breaks the adhesive bond. This is why shirts that come out of the dryer looking fine often crack after a few more wears. The damage is cumulative and invisible at first.
How to Iron Graphic Tees Safely
Ironing directly over a graphic print is one of the quickest ways to cause heat damage. The high temperature melts the ink and creates cracks that spread quickly with normal wear.
Always iron graphic tees inside out. This places the iron against the plain fabric backing rather than the print itself. Use a low to medium heat setting and avoid steam, which can react with certain inks.
For stubborn wrinkles around the print area, use a pressing cloth as a barrier. Place a thin cotton cloth over the design and iron on low heat. Never leave the iron stationary on any part of the shirt, as even brief contact can scorch the fibers and damage the print.
How to Store Graphic T-Shirts to Prevent Cracking
Storage is the most overlooked factor in print longevity. Folding graphic tees rather than hanging them prevents the fabric from stretching and the print from developing stress cracks along the fold lines.
Follow these storage best practices:
- Fold shirts flat and stack them in a drawer or on a shelf.
- Avoid hanging graphic tees on wire hangers, which create pressure points.
- Keep stored shirts away from direct sunlight and heat sources.
- Store in a cool, dry place to prevent moisture damage.
Sunlight is a silent killer of graphic prints. Ultraviolet light breaks down the pigments in the ink, causing fading that weakens the overall structure of the print (peer-reviewed research). A dark closet or drawer offers the best protection.
How to Fix Minor Cracks Before They Spread
Catching cracks early can save a shirt from total ruin. Minor surface cracking, where the design is still intact but shows fine lines, can often be stabilized before the damage spreads. This guide focuses on stabilizing the print and preventing the cracks from widening, not on making the shirt look brand new. A cracked print will never fully disappear, but you can stop it from getting worse.
Step 1: Assess the Damage
Hold the shirt up to a light source and inspect the print closely. Look for three things: fine surface lines, deeper fissures that catch your fingernail, and any lifting or peeling at the edges. Fine surface lines are the easiest to stabilize. Deep fissures require a more aggressive approach. Peeling edges need to be trimmed before anything else.
Step 2: Stabilize Surface Cracks with a Textile Medium
For fine surface lines, the goal is to re-establish a flexible bond across the cracked area. A textile medium, which is a liquid acrylic additive designed for fabric painting, is the right tool. It is available at most craft supply stores for under ten dollars.
- Turn the shirt inside out and place a piece of cardboard or wax paper between the front and back layers of the shirt. This prevents the medium from bleeding through to the other side.
- Turn the shirt right side out.
- Apply a thin, even layer of textile medium over the cracked area using a small foam brush. Do not saturate the fabric. You want to coat the surface of the print, not soak the shirt.
- Allow the medium to dry completely. This typically takes two to three hours.
- Apply a second thin coat, focusing on the deepest cracks.
- Once dry, turn the shirt inside out and iron over the treated area on a low heat setting with no steam. This heat sets the medium and helps it bond to the existing ink. Use a pressing cloth between the iron and the fabric.
Step 3: Reinforce Deep Fissures from the Inside
For cracks that catch your fingernail, a surface treatment alone will not hold. You need to reinforce the area from behind. An iron-on patch applied to the inside of the shirt provides structural support that prevents the crack from widening as the fabric flexes.
- Cut a piece of iron-on patch material slightly larger than the cracked area.
- Turn the shirt inside out.
- Place the patch, adhesive side down, over the cracked area on the inside of the shirt.
- Cover the patch with a thin cotton pressing cloth.
- Apply a hot iron for the time specified on the patch packaging, typically 10 to 15 seconds. Do not slide the iron. Press firmly and hold.
- Allow the patch to cool completely before moving the shirt.
Step 4: Trim Loose Edges
If the print is peeling at the edges, trim away the loose pieces with small, sharp scissors. Leaving them attached allows the peeling to spread as the loose edges catch on clothing and in the wash. Cut as close to the intact print as possible without cutting into the good area. After trimming, apply a thin line of fabric glue along the edge to seal it down.
When to Accept the Loss
If the print is cracked across more than half of its surface, or if the ink is flaking off in large pieces, the print is beyond repair. At this point, your options are to wear the shirt as a beater, repurpose it as a cleaning rag, or remove the print entirely. Print removal is possible with a product designed to dissolve plastisol ink, but it is a messy process that can leave a ghost image on the fabric. For most shirts, the honest answer is that the print has reached the end of its life.
Common Laundry Mistakes That Ruin Graphic Tees
Most graphic tee damage comes down to a handful of repeatable mistakes. Identifying these habits is the first step toward breaking them.
| Mistake | Why It Damages | Better Approach |
|---|---|---|
| Washing in hot water | Softens ink and weakens adhesion | Always use cold water |
| Tumble drying on high | Heat expands ink faster than fabric | Air dry or use low heat |
| Using fabric softener | Leaves residue that breaks down ink | Skip it entirely |
| Washing right side out | Print rubs against other clothes | Turn inside out |
| Ironing the design | Melts the ink directly | Iron inside out |
The most damaging habit is combining multiple mistakes at once. Washing a tee right side out in hot water, then throwing it in a hot dryer, guarantees premature cracking regardless of the print quality. Each step of the process compounds the stress on the design.
Conclusion: Keep Your Graphic Tees Looking New
Protecting your graphic tees requires consistent habits, not expensive equipment. Turn shirts inside out, wash in cold water, air dry whenever possible, and store them folded away from sunlight. These simple steps dramatically extend the life of any print.
At Shine Bright Shirts, we craft our collections for both style and durability, but even the best quality apparel needs proper care. Browse our curated designs for men, women, and kids, and wear them with confidence knowing you can keep them looking fresh. Explore our full range of high-quality, artist-designed tees and find your next favorite today.
Frequently Asked Questions
How do you fix a cracked graphic tee?
Minor cracks can be stabilized with a thin layer of clear fabric paint or a textile medium applied with a sponge. For larger cracks, iron-on vinyl patches over the damaged area can prevent further peeling. Once cracking starts, washing inside out and air drying will slow the damage. If the print is beyond repair, consider repurposing the shirt or purchasing a replacement.
Can you put graphic tees in the dryer?
You can, but it is the fastest way to damage the print. The heat and tumbling cause the ink to expand, contract, and rub against itself, which leads to cracking. If you must use a dryer, select the lowest heat setting and remove the shirt while it is still slightly damp. Air drying is the safest method to prevent graphic tees from cracking.
Does cold water wash help prevent shirt cracking?
Yes. Cold water is gentler on the fibers and the ink than warm or hot water. Heat softens the plastisol ink used in screen printing, making it more vulnerable to bending and stress during the wash cycle. A cold water wash reduces that stress and prevents the fabric from shrinking, which can distort the design.
How long do graphic tees last?
With proper care, a quality graphic tee can last several years. Turning the shirt inside out, washing in cold water, and air drying will extend the print's life well beyond average. The fabric usually wears out before the design does when these habits are followed.